Just a quick post to keep this old blog alive...
23 November 2023
20 April 2019
Glossary
Léxico. A not-meant-to-be-inclusive list of house & construction terminology as used in Mexico. This will grow as posts are added in this blog or I get time to add words I've used on those pages. I will change the date on this post whenever I make multiple additions or edits.
Acera (la) - sidewalk (see banqueta)
alambre (el) - wire (a. quemado or a. recocido - black steel tie-wire)
alambrón (el) - 1/4" smooth reinforcing rod, usually bent into anillos
albañil (el) - mason, home-builder
alisar - to make smooth
aljilbe (el) - water cistern (see cisterna)
anclar - to anchor
anillo (el) - ring, bent steel reinforcing stirrup
apisionar -to tamp down
aplanar - to make level
apoyo (el) - support
arena (la) - sand
atravesar - to move across
azulejo (el) - glazed or patterned wall tile (see loseta)
azotea (la) - flat roof
Banco (el) - bench
Banqueta (la) - sidewalk (see acera)
barreta (la) - pry bar, crowbar
bisel (el) - sloped edge as in chamfer or bevel (see chaflàn)
bodega (la) - storage room or closet
boveda (la) - arched brick ceiling
broca (la) - bit (for drill or screwdriver)
brocha (la) - paintbrush
Cadena (la) - reinforcing rods & stirrups for a concrete beam, or the beam itself (see dala)
calafatear - to caulk
calafateo (el) - caulking compound
calar - to drench
carga (la) - load (as in live load, dead load)
carretilla (la) - wheelbarrow
castillo (el) - reinforced concrete post or column
cemento (el) - cement (common - gris, white - blanco)
chaflán (el) - angled surface between two planes, chamfer (see bisel)
charco (el) - puddle
cimbra (la) - concrete form (usually made of wood), cimbrar - to erect formwork
cimiento (el) - foundation footing
cimentación (la) - foundation
cincel (el) - chisel (c. de corte frío - cold chisel)
cisterna (la) - water cistern (see aljilbe)
clavija (la) - peg
clavo - nail
cocina (la) - kitchen
colindancia (la) - adjoining parcel of property
colar - to place or cast (as in concrete); also - strain, filter
colocar - to place, emplace
comedor (el) - dining room
concreto (el) - concrete, a mix of cement, sand, gravel & water (c. armado or c. reforzado - reinforced concrete)
contramarco (el) - casing around a door or window (see marco)
cortadora de disco (la) - angle grinder, cutting tool for masonry & metal ( see esmeriladora)
croquís (el) - sketch or drawing
cuarto de servicio (el) - service room, usually housing laundry facilities, perhaps space for a maid to sleep
cubeta (la) - 5gal bucket (also, a ubiquitous all-purpose stool, tool box, etc)
Dala (la) - concrete beam (d. de cimentación - footing tie beam) (d. de desplante - structural beam); see cadena
desmontar - to clear the land
despintar - to remove paint from a surface
desplantar - to tilt, move out of level
destejado (el) - removal of roof tiles
drenaje (el) - system of waste-water disposal (instalación sanitaria)
Eje (el) - axis or center line
escalera (la) - ladder, stair (e. de extensión - extension ladder; e. de tijera - stepladder)
escarpio (el) - sloping side
escombro (el) - debris, demolition trash
escuadra (la) - right-angle layout tool, carpenter's square
escurrimiento (el) - run-off, drainage
esmeriladora (la) - grinder (e. angular - angle grinder), see also cortadora de disco
fusible (el) - fuse (see interruptor)
Grapa (la) - staple
grieta (la) - crack
grifa (la) - crowbar, bending tool
grifería (la) - bath or kitchen taps/faucet fittings
Habitación (la) - bedroom (see dormitorio, recamera)
Impermeabilizante (el) - waterproofing sealant
injectar - to inject
interruptor (el) - circuit breaker (see fusible)
Jardín (el) - garden
jeringa (la) - syringe
Ladrillo (el) - hard brick (see tabique)
lija (la) - sandpaper
lijadora (la) - sander (l. de disco - disk sander)
lima (la) - file
llave (la) - wrench (ll. de perico - crescent wrench, ll.inglesa - pipe wrench)
losa (la) - concrete slab
loseta (la) - glazed or pattered floor tile (see azulejo)
Machimbre (el) - tongue & groove joint
madera (la) - wood
maleza (la) - weeds or undergrowth
mampostería (la) - rubble masonry
marco (el) - frame, around a door or window (see contramarco)
marqesina (la) - skirt-roof, awning, roof overhang (see also volado)
martillo (el) - hammer
ménsula (la) - right-angle (shelf) bracket, corbel
mezcla (la) - mix, ie a batch of cement-aggregate-additives-water you are using at the time
mirador (el) - lookout or viewpoint over the surrounding landscape
mortero (el) - mortar
muro (el) - structural wall (see also pared)
Nivel - level
Obra (la) - a building work (or project) under construction
Pala (la) - shovel
pared (la) - the vertical surface of an interior room
peralte (el) - camber, slight convex curve
pica (la) - pick bar, lance
pico (el) - pickaxe
piedra (la) - rock, stone (p. braza - basalt)
pintar - to paint
plano (el) - plan
plantillo (el) - sole, bottom layer
plomada (la) - plumb bob
plomería (la) - system of potable water supply (instalación hidráulica)
podrido - rotten
proyecto (el) - project (see also obra)
Recamera (la) - bedroom (see also dormitorio, habitación)
ranura (la) - groove
refuerzo (el) - reinforcment
regar - to sprinkle
registro (el) - in-ground sanitary junction/cleanout box with removeable lid
resanador (el) - paste-like filler material for patching wood and plaster surfaces
raspador (el) - scraper
retechado (el) - replacement of a roof
Sala (la) - living room
segueta (la) - hacksaw
sierra (la) - saw (s. circular - skilsaw; s. reciprocante - reciprocating, s.caladora - saber)
soldar - to weld or solder
suelo (el) - soil
Tabique (el) - common, soft brick (only in México; elsewhere - interior partition wall)
tabla (la) - wooden board or plank
taquete (el) - expansion wall anchor or plastic or metal, to hold threaded fastener
taladro (el) - electric drill
tapajuntas (el) - joint over, flashing
techo (el) - roof, ceiling (this can be confusing)
teja (la) - formed clay or concrete roof tile (estilo árabe - colonial barrel tile)
tepetate (el) - soil-cement
terraza (la) - terrace or outdoor uncovered area floored with ceramic tiles
tinaco (el) - rooftop water storage tank
tornillo (el) - threaded screw
tramo (el) - line or route
trazar - to lay out the building outlines
triplay (el) - plywood (even if more than three-ply)
tubo (el) - pipe or tube
tuerca (la) - threaded nut
tumbar - to tear down
Varilla (la) - deformed steel rod, "rebar"
ventana (la) - window
viga (la) - beam, rafter
volado (el) - roof extension providing shade over lower windows
Zanja (la) - ditch
Acera (la) - sidewalk (see banqueta)
alambre (el) - wire (a. quemado or a. recocido - black steel tie-wire)
alambrón (el) - 1/4" smooth reinforcing rod, usually bent into anillos
albañil (el) - mason, home-builder
alisar - to make smooth
aljilbe (el) - water cistern (see cisterna)
anclar - to anchor
anillo (el) - ring, bent steel reinforcing stirrup
apisionar -to tamp down
aplanar - to make level
apoyo (el) - support
arena (la) - sand
atravesar - to move across
azulejo (el) - glazed or patterned wall tile (see loseta)
azotea (la) - flat roof
Banco (el) - bench
Banqueta (la) - sidewalk (see acera)
barreta (la) - pry bar, crowbar
bisel (el) - sloped edge as in chamfer or bevel (see chaflàn)
bodega (la) - storage room or closet
boveda (la) - arched brick ceiling
broca (la) - bit (for drill or screwdriver)
brocha (la) - paintbrush
Cadena (la) - reinforcing rods & stirrups for a concrete beam, or the beam itself (see dala)
calafatear - to caulk
calafateo (el) - caulking compound
calar - to drench
carga (la) - load (as in live load, dead load)
carretilla (la) - wheelbarrow
castillo (el) - reinforced concrete post or column
cemento (el) - cement (common - gris, white - blanco)
chaflán (el) - angled surface between two planes, chamfer (see bisel)
charco (el) - puddle
cimbra (la) - concrete form (usually made of wood), cimbrar - to erect formwork
cimiento (el) - foundation footing
cimentación (la) - foundation
cincel (el) - chisel (c. de corte frío - cold chisel)
cisterna (la) - water cistern (see aljilbe)
clavija (la) - peg
clavo - nail
cocina (la) - kitchen
colindancia (la) - adjoining parcel of property
colar - to place or cast (as in concrete); also - strain, filter
colocar - to place, emplace
comedor (el) - dining room
concreto (el) - concrete, a mix of cement, sand, gravel & water (c. armado or c. reforzado - reinforced concrete)
contramarco (el) - casing around a door or window (see marco)
cortadora de disco (la) - angle grinder, cutting tool for masonry & metal ( see esmeriladora)
croquís (el) - sketch or drawing
cuarto de servicio (el) - service room, usually housing laundry facilities, perhaps space for a maid to sleep
cubeta (la) - 5gal bucket (also, a ubiquitous all-purpose stool, tool box, etc)
Dala (la) - concrete beam (d. de cimentación - footing tie beam) (d. de desplante - structural beam); see cadena
desmontar - to clear the land
despintar - to remove paint from a surface
desplantar - to tilt, move out of level
destejado (el) - removal of roof tiles
drenaje (el) - system of waste-water disposal (instalación sanitaria)
Eje (el) - axis or center line
escalera (la) - ladder, stair (e. de extensión - extension ladder; e. de tijera - stepladder)
escarpio (el) - sloping side
escombro (el) - debris, demolition trash
escuadra (la) - right-angle layout tool, carpenter's square
escurrimiento (el) - run-off, drainage
esmeriladora (la) - grinder (e. angular - angle grinder), see also cortadora de disco
estaca (la) - stake
excavar - to dig, excavate
Fuga (la) - leakfusible (el) - fuse (see interruptor)
Grapa (la) - staple
grieta (la) - crack
grifa (la) - crowbar, bending tool
grifería (la) - bath or kitchen taps/faucet fittings
Habitación (la) - bedroom (see dormitorio, recamera)
Impermeabilizante (el) - waterproofing sealant
injectar - to inject
interruptor (el) - circuit breaker (see fusible)
Jardín (el) - garden
jeringa (la) - syringe
Ladrillo (el) - hard brick (see tabique)
lija (la) - sandpaper
lijadora (la) - sander (l. de disco - disk sander)
lima (la) - file
llave (la) - wrench (ll. de perico - crescent wrench, ll.inglesa - pipe wrench)
losa (la) - concrete slab
loseta (la) - glazed or pattered floor tile (see azulejo)
Machimbre (el) - tongue & groove joint
madera (la) - wood
maleza (la) - weeds or undergrowth
mampostería (la) - rubble masonry
marco (el) - frame, around a door or window (see contramarco)
marqesina (la) - skirt-roof, awning, roof overhang (see also volado)
martillo (el) - hammer
ménsula (la) - right-angle (shelf) bracket, corbel
mezcla (la) - mix, ie a batch of cement-aggregate-additives-water you are using at the time
mirador (el) - lookout or viewpoint over the surrounding landscape
mortero (el) - mortar
muro (el) - structural wall (see also pared)
Nivel - level
Obra (la) - a building work (or project) under construction
Pala (la) - shovel
pared (la) - the vertical surface of an interior room
peralte (el) - camber, slight convex curve
pica (la) - pick bar, lance
pico (el) - pickaxe
piedra (la) - rock, stone (p. braza - basalt)
pintar - to paint
plano (el) - plan
plantillo (el) - sole, bottom layer
plomada (la) - plumb bob
plomería (la) - system of potable water supply (instalación hidráulica)
podrido - rotten
proyecto (el) - project (see also obra)
Recamera (la) - bedroom (see also dormitorio, habitación)
ranura (la) - groove
refuerzo (el) - reinforcment
regar - to sprinkle
registro (el) - in-ground sanitary junction/cleanout box with removeable lid
resanador (el) - paste-like filler material for patching wood and plaster surfaces
raspador (el) - scraper
retechado (el) - replacement of a roof
Sala (la) - living room
segueta (la) - hacksaw
sierra (la) - saw (s. circular - skilsaw; s. reciprocante - reciprocating, s.caladora - saber)
soldar - to weld or solder
suelo (el) - soil
Tabique (el) - common, soft brick (only in México; elsewhere - interior partition wall)
tabla (la) - wooden board or plank
taquete (el) - expansion wall anchor or plastic or metal, to hold threaded fastener
taladro (el) - electric drill
tapajuntas (el) - joint over, flashing
techo (el) - roof, ceiling (this can be confusing)
teja (la) - formed clay or concrete roof tile (estilo árabe - colonial barrel tile)
tepetate (el) - soil-cement
terraza (la) - terrace or outdoor uncovered area floored with ceramic tiles
tinaco (el) - rooftop water storage tank
tornillo (el) - threaded screw
tramo (el) - line or route
trazar - to lay out the building outlines
triplay (el) - plywood (even if more than three-ply)
tubo (el) - pipe or tube
tuerca (la) - threaded nut
tumbar - to tear down
Varilla (la) - deformed steel rod, "rebar"
ventana (la) - window
viga (la) - beam, rafter
volado (el) - roof extension providing shade over lower windows
Zanja (la) - ditch
31 January 2014
Foundation & Sewer
Trabajo en el suelo: Cimientos y Drenaje Onward and downward to the below-ground portions of our house renovations. Our plans called for a new addition, to be built in the grass-covered area between the dining area in the southwest corner of the house, and the outlying laundry or cuarto de servicio in the SW corner of the lot. This area measures about four by three meters, and the new construction would create a full bathroom for the ground floor and a back entrance hall, and a second story flat roof terraza opening off the master bedroom. Like most new structure construction projects here, one has to start at the bottom. This meant excavation and foundation/footings.
Locating a new bathroom meant that we had to come up with a drenaje (drainage) plan. The existing laundry drained into a registro, a concrete collector box sunk into the driveway/sidewalk outside the large gate at the northwest corner of the lot. Prying up the cover of the registro, we discovered that the laundry drain was only a 2" PVC line, and the line exiting the box connecting to the city sewer was also this size. Obviously a new, larger line had to drain the new bathroom. Running the waste lines the other direction, to the calle on the southeast corner of the house where all the other existing house plumbing drained, was off the table. It would have meant digging thru the interior floors, with no guarantee that a line buried there could be sufficiently sloped to drain the toilet connection in the floor of the new bathroom.
Dan asked our nextdoor neighbor (a renter), Valentín, if he knew where the sewer line ran down the avenida in front of his house, but he had no idea where his waste lines ran. This meant the first of many trips to the CASF (Comision de Agua y Saneamiento, Water and Sanitation Commission) to locate and arrange for our new sewer connection. The fellows from CASF visited several times, after consulting city maps and even talking to retired employees who might have some ideas. This was a long process, and ultimately involved the engineering and design department. It was determined that there was no city line in the avenida, connecting to a branch of the city sewer, but apparently when each house had been built lines had been laid independently.
It came down to three choices for us: (1) run a new line from a new, enlarged registro at the cormer of our property, at a depth of about three feet, west down the avenida to a city line buried under Calle 9, a distance of about 80 meters; (2) run a new line east to the city sewer line under Calle 11, a shorter distance of only 20 meters, but we'd have to connect at a depth of over 10 feet; or (3) tie into the existing 4" pipe just west of Valentín's registro, from which the sewage would be drained into the creek at the bottom of the hill.
Wanting to be ecologically responsible, we rejected option three and were all set to go for the second choice, and had the CASF architect figure out the route and slope required for the connection. Then the CASF project engineer, who would actually oversee the work, revealed that whichever choice we made, the sewage outfall would be into a streambed arroyo, either close to us or a bit south where the lines in the calles ended. A master sewage plan for the city, with a treatment plant at the south end of town has been planned for years, but lacking funding, won't happen anytime soon (years and years, maybe never). He advised using option three (the cheapest option, about US$300 we'd have to pay for the city to do the job), and which in truth is how all the homes above us on the stream have connected.
 This still doesn't sit well with us, and we have resolved to use that toilet infrequently, use the minimum amount of toilet paper, and investigate composting alternatives. We actually won't have to use that bathroom exclusively until we are too infirm to manage the stairs and have moved our sleeping quarters to downstairs. The actual city work to connect our registro to the line in the street (digging up the roadside gutter and driveway of our neighbor, digging and burying the line, concreting over everything) didn't take place until almost three months after the rest of the renovation was completed. We showed up at the CASF offices every week, received assurances that the job would be done right away, this week, etc until it finally happened in late August.


 This rough footing was was capped with a leveling course of concrete. Our crew of abañiles (masons) laid up the rest of the foundation for the bathroom walls, with a stemwall of two rows of blocks (bringing things to ground level), topped with a reinforced cadena (beam) bonding the stemwall together. Dan decided the best next task was to get all the white PVC waste pipes in the ground and covered, permitting all the rest of the work to take place on flat ground. The crew started removing the paving blocks in the backyard, and opening the ditches we'll need to run from the new bath area to the sidewalk.

 Since the city sanitation fellows assured us that, ultimately, a sewer connection could be made from the location of our existing registro, we were now ready to lay down our new larger lines. The PVC main lines run diagonally from the location of the toilet in the southeast corner of the new bath, past the shower and into the backyard, then turn 45º and aim toward the registro location. It was not necessary to disturb the existing 2" line running from the laundry (under the bbq) so both lines dump into the registro independently.

 Our living room floor looked like a child has been playing with his building blocks, as Dan had all the plumbing fittings for the drain lines set out to make sure everything would connect as he envisioned.. The old registro that took the 2” drain line from the laundry was broken out Luís and Alfonso continued ditching in the addition's floor area, cut all the PVC pipe and dry fitted it all together. Dan looked it over and approved the layout, and the guys proceeded to glue up everything, and then backfill. Two vertical PVC lines were set inside castillos. A large 4" line went up to the terraza level, which would serve as a floor drain to deal with rain falling there, and a 2" vent went up in the castillo in the corner of the wall behind the toilet. It would serve as a wet vent (a drain line for a small handsink planned for the terraza level), continuing up the party wall an additional story high to vent the fixtures below. Vents are almost non-existent in waste plumning here south of the border, but are essential at keeping sewer smells out of the house.
Luís, agreeing with comments from the city engineer, directed work on reconstructing the registro. The old one was broken out and re-made large enough for input from the new 4" PVC line. A new lid was cast and put in place by the back gate.
 Next: New Walls
Locating a new bathroom meant that we had to come up with a drenaje (drainage) plan. The existing laundry drained into a registro, a concrete collector box sunk into the driveway/sidewalk outside the large gate at the northwest corner of the lot. Prying up the cover of the registro, we discovered that the laundry drain was only a 2" PVC line, and the line exiting the box connecting to the city sewer was also this size. Obviously a new, larger line had to drain the new bathroom. Running the waste lines the other direction, to the calle on the southeast corner of the house where all the other existing house plumbing drained, was off the table. It would have meant digging thru the interior floors, with no guarantee that a line buried there could be sufficiently sloped to drain the toilet connection in the floor of the new bathroom.
Dan asked our nextdoor neighbor (a renter), Valentín, if he knew where the sewer line ran down the avenida in front of his house, but he had no idea where his waste lines ran. This meant the first of many trips to the CASF (Comision de Agua y Saneamiento, Water and Sanitation Commission) to locate and arrange for our new sewer connection. The fellows from CASF visited several times, after consulting city maps and even talking to retired employees who might have some ideas. This was a long process, and ultimately involved the engineering and design department. It was determined that there was no city line in the avenida, connecting to a branch of the city sewer, but apparently when each house had been built lines had been laid independently.
It came down to three choices for us: (1) run a new line from a new, enlarged registro at the cormer of our property, at a depth of about three feet, west down the avenida to a city line buried under Calle 9, a distance of about 80 meters; (2) run a new line east to the city sewer line under Calle 11, a shorter distance of only 20 meters, but we'd have to connect at a depth of over 10 feet; or (3) tie into the existing 4" pipe just west of Valentín's registro, from which the sewage would be drained into the creek at the bottom of the hill.
Wanting to be ecologically responsible, we rejected option three and were all set to go for the second choice, and had the CASF architect figure out the route and slope required for the connection. Then the CASF project engineer, who would actually oversee the work, revealed that whichever choice we made, the sewage outfall would be into a streambed arroyo, either close to us or a bit south where the lines in the calles ended. A master sewage plan for the city, with a treatment plant at the south end of town has been planned for years, but lacking funding, won't happen anytime soon (years and years, maybe never). He advised using option three (the cheapest option, about US$300 we'd have to pay for the city to do the job), and which in truth is how all the homes above us on the stream have connected.
In late January 2013, the roof repairs complete, our crew moved on to the below-ground work, the work on our cimientos (foundation or footings). Luís made estimates and Dan ordered all the brick, block, steel, cement, gravel, sand, and the work commenced. Straight-sided ditches underneath the positions of the bearing walls were dug, and pieces of larger construction rubble and rock were placed and tamped there at the bottom of the trenches. Part of the crew cut and bent 3/8" varilla (rebar) and alambrón (1/4" smooth rod) formed into stirrups and ties, for horizontal reinforcement and the vertical castillos (posts situated at the corners/ends of the new walls). The vertical reinforcing is bedded in the footings, will be secured in the roof, and stands there as a skeleton until the walls are laid.
This rough footing was was capped with a leveling course of concrete. Our crew of abañiles (masons) laid up the rest of the foundation for the bathroom walls, with a stemwall of two rows of blocks (bringing things to ground level), topped with a reinforced cadena (beam) bonding the stemwall together. Dan decided the best next task was to get all the white PVC waste pipes in the ground and covered, permitting all the rest of the work to take place on flat ground. The crew started removing the paving blocks in the backyard, and opening the ditches we'll need to run from the new bath area to the sidewalk.

Luís, agreeing with comments from the city engineer, directed work on reconstructing the registro. The old one was broken out and re-made large enough for input from the new 4" PVC line. A new lid was cast and put in place by the back gate.
12 December 2013
Skirt-roofs & Overhangs


It should be said here that the 4" wood machimbre (tongue & groove) boards and heavy beams that were used as a base for pouring the roof slabs, and which form the very attractive open-beam cathedral ceilings in the upstairs bedrooms are, for the most part, now, non-structural. This is in the sense that we could remove them and the reinforced slab roof would still be in place. The only small area which would have to be worked over bit by bit (should all the wood be removed) would be the perimeter joint where the walls meet the roof slab. Here work would have to be done replacing (with concrete grout and metal ties) the ¾" thickness of wood that is sandwiched between the top of the wall and the underside of the slab.
 In the skirt-roof I chose, only the very lowest exposed board had moisture-caused rot in it, and the protruding beam ends were in good shape. The first task was to insert a hacksaw blade between tabla and viga to cut off the nails holding the board in place.It was then a simple matter to insert a good board in it's place, toenailing up thru the corner of the beam to affix it. Very fortunately, there was enough good machimbre material left from the demolition of the skirt-roofs from the laundry building and over the double doorway into the dining room space, that I didn't have to locate a sawmill which could work up new matching t&g boards. All the wood that replaced the bad in the roofs was treated on all sides with festermicide, a preservative and termite & fungus preventative, before being put into place.
The flashing technique which I used involved inserting the slightly opened up angle between the tarpaper layer and the wood, lapping any ends in the angle stock by several inches, and caulking the metal in place along the upper angle fold and the concrete slab. I located a good quality, gray slate-colored acrylic latex/silicone calafateo (caulk), which worked as an adhesive as well as a sealant. Since the joint shouldn't "work" any, other than some expansion of the metal in the hottest weather, and no freeze-thaw cycles to worry about, this should be a long lasting joint. If there are any problems, some additional caulk squeezed into any cracks that develop should take care of things. Due to the pounding out of the angle, the metal hangs down outside the edge of the tablas, providing a sharp drip edge for water to fall free of the wood. I worked around all the roof edges reachable by stepladder (the porch and living room window skirt-roofs), leaving the upper story for the younger, nimbler guys to complete.
The only other issue to be worked out was how to replace the rotten beam ends that were under the various roof overhangs. One beam over a living room window obviously had problems, and when I started working on it is was clear it had to be totally replaced, due to end rot and then termite damage farther up. This meant, for this beam end, actually cutting it off almost flush using my sierra reciprocante (reciprocating saw), then digging out the remainder well into the wall surface with various large brocas (drill bits) and cincels (chisels) and wrestling the remaining wood out of the hole. The guys used a a good beam end salvaged from the laundry room roof for a visually perfect replacement, which they cemented into the hole in the wall and nailed into the t&g boards which were cantilvered above it.
 Fortunately, the remaining beam ends were not this bad, with the damaged ones mostly on the west and high north sides of the house. (Natch, the easiest ones to replace would be the ones on the east, where one could stand on the porch roof to get to them. These however, were in the best shape and didn't need much attention.) The vigas supporting the tablas, on 1 meter centers are full-dimension 4"x6" in cross section, and the two under the roof hips were 6"x8"). José Luís, my foreman, ordered up milled ocote (hard pine) from a friend with a mill in Coscomatepec. They arrived, rough-planed, after a couple of weeks, and they were treated with festermicide and sticker-stacked on the front porch to cure a bit while the crew devoted themselves to building the new building addition. The damaged beam ends and rotted tablas were removed pending replacement


Next: Foundation & Sewer Lines
01 November 2013
Re-roofing
Retechado Now that the clay barrel tiles and mortar had been pried up, chipped off and taken off the roof, we were left with a structural surface of very rough (about 1:4 slope) reinforced concrete slabs about 10cm (4") thick. It was immediately apparent why we had leaks into the master bedroom. Above this room there were areas where the concrete covering the reinforcing was very thin, so water had entered into cracks and rusted the rebar, causing the concrete to spall. I had the guys chip out the weakened concrete, wirebrush the steel and apply new concrete to patch the holes. At this point we could have started re-tiling the roof.
The roof itself is composed of three slopes facing east, north and west, with diagonal hips at the two outer corners. A short ridge line running north-south abuts a small open-to-the-sky "room" above the bathroom. The walls to this space are about 2.4m (8') high, and hide the location of the tinaco (water storage tank) and house plumbing from view. These walls are the highest point in the house, except for the chimney which comes up the north wall of the building and thru the roof there, several inches higher.
 Not wanting to have to ever revisit the roof slab surface again, removing tiles, patching etc, we decided to put a bit more money and effort at insuring the roof was water-tight. After doing some research, we purchased some Impercem, a cement formulation used for watertight applications (water tanks, pools, etc) and had the guys apply a smooth thin coat of waterproof stucco over the entire roof surface. After this was cured, a coat of Fester Acriton, a fast drying impermeabilizante (sealer), was painted on top.
There was much discussion about how best to finish the roof. Many homes here have smooth slabs just painted with sealer, usually red like we used, so we could have been finished at this point. But, we would have to repaint the roof every seven years or so. And we would have changed the appearance of the house significantly by removing the arching tiles that gave it the "colonial" look we liked.
 In Cordoba one day, I took a tile taken from our roof to a tile and block store, to ask what replacement tiles like these would cost. Seems they would be a special order, as the only ones now made in that old style are a bit smaller. The new tiles would cost MX$8 a piece, and we'd need about 2000 tiles. Another option would be to use a formed sheet material (steel, composite, asphalt) with a large corrugated aspect so from a distance it would be in keeping the with tiled lower roofs. The problem with these materials is that it is difficult to attach them to a slab and prevent them from lifting off in a strong wind. We settled on using concrete "California" tiles from a local company, Pretensur, which quoted a price just about what the weaker clay tiles would have cost. The concrete tiles from a distance are in keeping with the spanish look we wanted to maintain, are harder/tougher and safer to walk on for roof maintenance, and don't lift off in hurricanes. The tiles would be delivered in a week.
 While we waited the guys shifted focus to building the structure for our future roof top deck and mirador (overlook), and to sealing and waterproofing the space where the tinaco sat (topics for another post). Our new concrete roof tiles were delivered late one morning. Our guys unloaded the 1000 tiles by hand, stacking them in the backyard on three sheets of plywood laid on the ground, two rows high. As they were needed, they are carried on shoulders up two ladders to the roof top, three tiles at a time. Each tile weighs about 11¼ pounds.

 Luis made the calculations to figure out how much overlap each row of tiles would require, to avoid having to the trim the final upper row at the ridge. Chalk-lining done, the first row, overhanging the roof edge by an amount sufficient to allow water to run off and not seep back to the fascia was mortared into place. The mortar, of course, mixed by hand on the street outside the backyard gate, and brought up to the roof by the bucketful. The only cutting we had to do was for the angles along the hips. I brought down an esmeriladora angular (angle grinder) when we moved here, and it saw plenty of duty cutting these tiles (and later cutting, block, brick, floor and wall tiles, cutting channels in masonry walls, and with a steel abrasives disk installed, cutting rebar).

 The job of re-roofing took about two weeks, as laying the tiles accurately, adhering each one with mortar, is not as quick as nailing down shingles. After getting into the swing of things, two of the guys moved over to filling in mortar along and under tile eave edges (eg bird-blocking) along the now-finished east side of roof. They also tiled (with tiles cut in half) the top of the 18' high perimeter wall off the southeast house corner. This put them on a stepladder on top of the lower porch roof, using the special slanted plywood platforms I had made for painting the windows there. To do the north and west roof edges, straight drops to the ground, the guys attached wood studs to the top sides of the extension ladder so it could reach up under the eaves. These two were the gophers carrying mortar and tiles up to the roof for the guys laying the tiles down.

 The final touches to the roof was the application of red sealer on all of the bare mortar surfaces. Before we finished with our crew, they also pressure washed all of the older clay-tiled roofs, and waterproofed them a bit with a clear coat of Comex sealer. Later I came up to the roof to fill in the few corrugations in the tiles upslope of the chimney with stucco (where in the states we'd build a cricket) that I had noticed sitting filled with water after rainstorms.
Next: Skirt-roofs & Overhangs
The roof itself is composed of three slopes facing east, north and west, with diagonal hips at the two outer corners. A short ridge line running north-south abuts a small open-to-the-sky "room" above the bathroom. The walls to this space are about 2.4m (8') high, and hide the location of the tinaco (water storage tank) and house plumbing from view. These walls are the highest point in the house, except for the chimney which comes up the north wall of the building and thru the roof there, several inches higher.
 Not wanting to have to ever revisit the roof slab surface again, removing tiles, patching etc, we decided to put a bit more money and effort at insuring the roof was water-tight. After doing some research, we purchased some Impercem, a cement formulation used for watertight applications (water tanks, pools, etc) and had the guys apply a smooth thin coat of waterproof stucco over the entire roof surface. After this was cured, a coat of Fester Acriton, a fast drying impermeabilizante (sealer), was painted on top.
There was much discussion about how best to finish the roof. Many homes here have smooth slabs just painted with sealer, usually red like we used, so we could have been finished at this point. But, we would have to repaint the roof every seven years or so. And we would have changed the appearance of the house significantly by removing the arching tiles that gave it the "colonial" look we liked.


Next: Skirt-roofs & Overhangs
30 September 2013
De-tiling the Roof

Destejado. Here are some pictures of the tiled roof before any work was started. These baked unsealed clay tiles are in the basic traditional curved or arabic style. Originally, in colonial times, these tejas were laid concave face up nested on closely spaced open vigas (rafters) to form rain-draining channels, with another layer convex curve up capping the rafters and lower tiles. On this roof, the same colonial look was achieved, but the alternating tiles were bedded in mortar on a 10cm thick sloping rooftop reinforced concrete losa (slab).
 It was clear that these tiles, on the house only since it was built 15 years ago, were not the best choice for a low maintenance roof. A person must be extremely careful setting one's weight down when walking on the surface, to avoid cracking the tiles. The only people up there would have been installers of the TV cables, and perhaps workers periodically cleaning the tiles. Easily 25% to 33% of the tiles on the roof were damaged in some way--broken, loose or missing. It was an easy decision to make our first renovation job stripping and removing everything off the techo (roof) down to the bare slab.
The temporary chute at the front corner of the house allowed drop-delivery of bucket-fulls of escombro (debris) off the roof safely, deposited streetside in a big bin. We also bought a raspador, a heavy chisel with 4' handle. That with palas (shovels), martillos (hammers), cinceles de corte frío (cold chisels), barretas/grifas (pry bars) of various kinds, plus some well used/abused empty cubetas (5gal buckets) given to us by Frank, were all the tools needed for this job. The 10' extension ladder (escalera de extensión) was separated into its two pieces, and one provided access to the lower roof over the comedor (dining room), with another set up on that small roof to access the main roof above.


The tejas that could be saved were stacked on the roof, and eventually carried down the ladders on young shoulders, or tossed down individually to a careful catcher, to end up on the growing stack below along the back wall of the yard. Since we had determined that newly manufactured tejas árabes (a few inches shorter & narrower than the old colonial style that were on the house) were for sale locally at MX$8 (eight pesos or approx US$0.60) each,


I put up a sign on the front gate offering to sell our excess. After saving some for future repairs of the remaining lower roofs, we had maybe 900 tiles to dispose of. There was sporadic interest by passers-by, but invariably when the homeowner-prospective purchaser would go home to consult his albañil (mason), nothing ever came of it. Even at a reduced price of MX$3, nobody bit. Towards the end of the renovation job we gave the tiles to our work crew, and they hauled them away up to their village outside of Coscomatepec for personal use.
The piles of escombro in the box and at the side of the road continued to grow, almost bursting the triplay (plywood) bin. In addition to stripping the two larger roofs, the marquesinas (awning roofs) over the dining room door, the laundry ventana (window), and another in the sala (living room) had to come off for the planned new full bathroom on the ground floor. This of course add to the volume of debris to be disposed of, and more used tiles to the huge stack against the wall..


Next: Re-roof
26 September 2013
Getting Ready

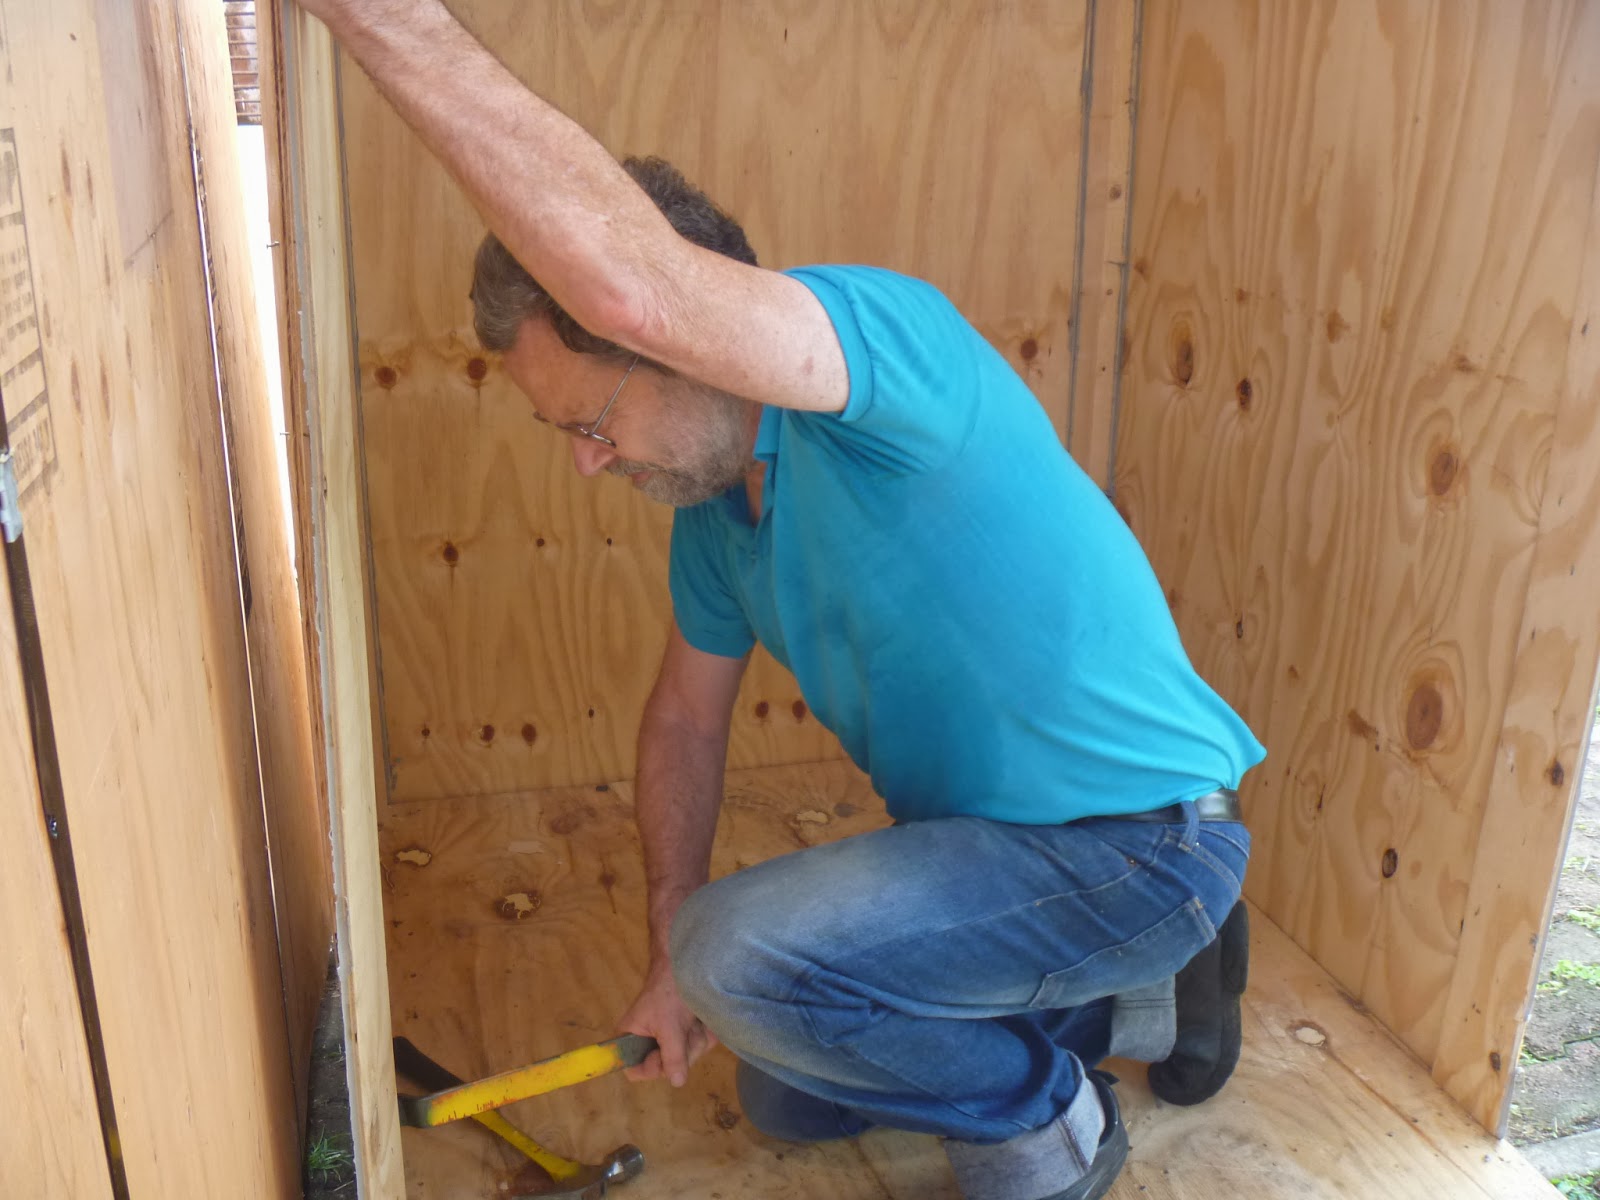
Our labor crew still had obligations to our friends Frank and Ania, who were still working on their new house about nine blocks from here. Those obligations took another two months, during which time we worked by ourselves on smaller tasks, which will eventually get covered here: painting, weatherizing, furnishings, etc. We also had to locate stores and suppliers for the various supplies we would need, and buy a few tools, so several visits to the next-door cities of Córdoba & Orizaba figured in here too. We had a great resource available to us, as we had confirmed with Strom-White that the five liftvans in which our household goods had been transported to us were, indeed, ours. We instructed the delivery guys to move them into our backyard, where we could disassemble them for their component materials.

Just before our crew would start on our project, we put all our energy into building a disposal chute for the debris that would come off the roof, using plywood and lumber from the liftvans. Pitching the broken tiles, mortar and concrete directly down onto the street would be hazardous to passing vehicles and make a real mess below.

The third week of December the crew of workers was finally ours. The day they arrived, I briefly explained what we wanted done with the house, and all agreed that working on the roof was the top priority, considering that we had experienced various leaks in some of the upstairs rooms in the rainy part of the past October. As the first job for the crew, I set them to building a receiving bin on the road, below where the chute would discharge, using the pallet-like bottoms of the old liftvans.
Next: de-roofing
Subscribe to:
Posts (Atom)