12 December 2013

Skirt-roofs & Overhangs


Marquesinas  Each downstairs window, except for the ones opening onto the front porch, has a protective flat awning-style skirt-roof over it, sticking out about two feet from the wall, to direct rain water away from the window opening.  Above, the main roof overhangs the walls all around by about three feet.  The original clay barrel tiles stuck out about 2.5" past the roof slabs, not enough to prevent rain washing down to all fall freely off the roof.  (The new concrete tiles are set out with 4" of exposure to reduce the chance of this occurring in the future.)

Years of moss build-up, occasional cracks and accumulated dirt meant that in any rain surface tension would cause some of the water to back up the undersides of the roof tiles and then run down the slab edges and onto the roof tablas and vigas (sheathing boards and beams).  While there was a layer of tarpaper laid on top of the boards before pouring the reinforced roof slabs, there was no effort made to continue protection over the outboard tablas. The constantly re-wetted lowest-down board edges, and the beam ends, demonstrated serious rot, especially on the west edge of the upper roof.  Here are some "before" pictures to illustrate.  We used fotos like these to bid down the purchase price of the house, since we knew we couldn't leave things in this state and it would take serious effort to correct the situation.

It should be said here that the 4" wood machimbre (tongue & groove) boards and heavy beams that were used as a base for pouring the roof slabs, and which form the very attractive open-beam cathedral ceilings in the upstairs bedrooms are, for the most part, now, non-structural.  This is in the sense that we could remove them and the reinforced slab roof would still be in place.  The only small area which would have to be worked over bit by bit (should all the wood be removed) would be the perimeter joint where the walls meet the roof slab.  Here work would have to be done replacing (with concrete grout and metal ties) the ¾" thickness of wood that is sandwiched between the top of the wall and the underside of the slab.

It was obvious that there would have be some method of flashing the concrete-wood seam along all the exposed roof edges.  But, it seems like no one down here has heard of flashing, and it is not available in any of the construction supply houses, and I visited virtually all of them in the city.  The words I used to convey the very idea of "flashing" were tapajuntas de escurrimiento (something like "run-off joint cover") -- all I got was blank stares and directions to another supplier who just might have heard of such a strange thing.  We were about to order some made up at the one specialty sheet metal shop in Córdoba, when Home Depot opened it's new store there. We actually found 8' lengths of galvanized sheet-metal "90º el"-shaped stock (about 3cm x 3cm) there, which could do the job with a little pounding out to open up the angle a bit.  To see if we were going to do this to all our windows, and all along the roof edges, I worked out the kinks by using this material on the marquesina over one window.

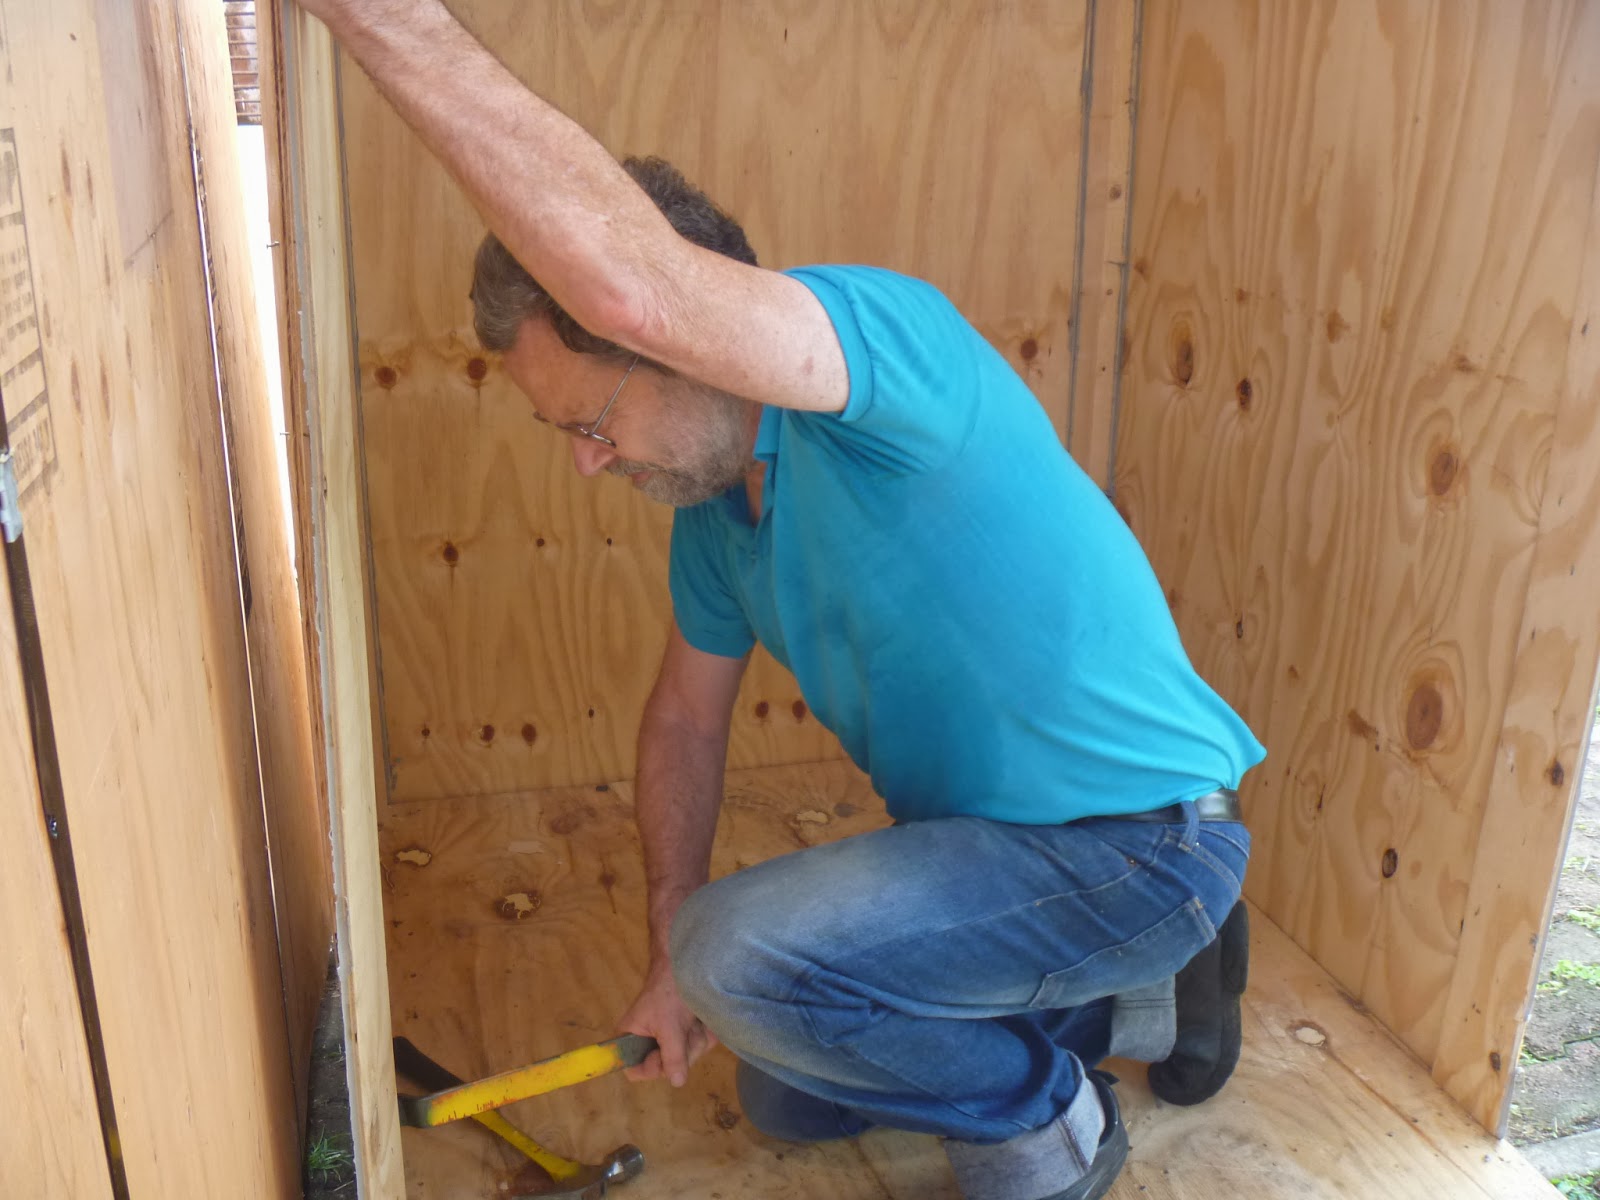
In the skirt-roof I chose, only the very lowest exposed board had moisture-caused rot in it, and the protruding beam ends were in good shape. The first task was to insert a hacksaw blade between tabla and viga to cut off the nails holding the board in place.It was then a simple matter to insert a good board in it's place, toenailing up thru the corner of the beam to affix it.  Very fortunately, there was enough good machimbre material left from the demolition of the skirt-roofs from the laundry building and over the double doorway into the dining room space, that I didn't have to locate a sawmill which could work up new matching t&g boards. All the wood that replaced the bad in the roofs was treated on all sides with festermicide, a preservative and termite & fungus preventative, before being put into place.

The flashing technique which I used involved inserting the slightly opened up angle between the tarpaper layer and the wood, lapping any ends in the angle stock by several inches, and caulking the metal in place along the upper angle fold and the concrete slab.  I located a good quality, gray slate-colored acrylic latex/silicone calafateo (caulk), which worked as an adhesive as well as a sealant.  Since the joint shouldn't "work" any, other than some expansion of the metal in the hottest weather, and no freeze-thaw cycles to worry about, this should be a long lasting joint.  If there are any problems, some additional caulk squeezed into any cracks that develop should take care of things.  Due to the pounding out of the angle, the metal hangs down outside the edge of the tablas, providing a sharp drip edge for water to fall free of the wood.   I worked around all the roof edges reachable by stepladder (the porch and living room window skirt-roofs), leaving the upper story for the younger, nimbler guys to complete.

The only other issue to be worked out was how to replace the rotten beam ends that were under the various roof overhangs.  One beam over a living room window obviously had problems, and when I started working on it is was clear it had to be totally replaced, due to end rot and then termite damage farther up.  This meant, for this beam end, actually cutting it off almost flush using my sierra reciprocante (reciprocating saw), then digging out the remainder well into the wall surface with various large brocas (drill bits) and cincels (chisels) and wrestling the remaining wood out of the hole. The guys used a a good beam end salvaged from the laundry room roof for a visually perfect replacement, which they cemented into the hole in the wall and nailed into the t&g boards which were cantilvered above it.

Fortunately, the remaining beam ends were not this bad, with the damaged ones mostly on the west and high north sides of the house.  (Natch, the easiest ones to replace would be the ones on the east, where one could stand on the porch roof to get to them.  These however, were in the best shape and didn't need much attention.)  The vigas supporting the tablas, on 1 meter centers are full-dimension 4"x6" in cross section, and the two under the roof hips were 6"x8").  José Luís, my foreman, ordered up milled ocote (hard pine) from a friend with a mill in Coscomatepec.  They arrived, rough-planed, after a couple of weeks, and they were treated with festermicide and sticker-stacked on the front porch to cure a bit while the crew devoted themselves to building the new building addition.  The damaged beam ends and rotted tablas were removed pending replacement

Later in the year, after all the masonry work was done but before the house painting was to start, the guys moved into rough carpentry mode. Each viga was trimmed back to good wood, and the bad tablas removed.  Then, a replacement beam end was cut to length, with the recurved end fashioned to match the existing ones.  After all the trimming was done, the pieces were sanded, treated again with festermicide and then stained to match the existing beams.  The technique developed to affix the beam ends involved drilling two deep aligned ⅜" holes in both the old beam where it was cut off and the newly fashioned outboard end.  Lengths of rebar were driven into the holes and the new beam end pounded into place.  Heavy galvanized mending straps were then lag-screwed onto both pieces, bridging the joint on both sides.  Replacement t&g boards were slipped into place and tacked in. For the two heavy hip ridge beams (upon which the smaller vigas rest), an additional piece of rebar was used. Fortunately, I brought along some 18" and 24" long wood boring bits in amongst my tools, as I haven't seen any of these here in hardware stores. including the new Home Depot.


We did  fully appreciate the new selection of hardware carried by the HD store, as large mending starps and big lag screws are other things that  seem to be hard-to-impossible to find otherwise.  When all the beam work was done, the guys completed the installation of the rest of the flashing. Festermicide was applied to all the unpainted wood surfaces inside and outside of the house, and injected by syringe into cracks, perforations and crevices wherever possible.


Next:  Foundation & Sewer Lines


01 November 2013

Re-roofing

Retechado  Now that the clay barrel tiles and mortar had been pried up, chipped off and taken off the roof, we were left with a structural surface of very rough (about 1:4 slope) reinforced concrete slabs about 10cm (4") thick.  It was immediately apparent why we had leaks into the master bedroom.  Above this room there were areas where the concrete covering the reinforcing was very thin, so water had entered into cracks and rusted the rebar, causing the concrete to spall.  I had the guys chip out the weakened concrete, wirebrush  the steel and apply new concrete to patch the holes.  At this point we could have started re-tiling the roof.

The roof itself is composed of three slopes facing east, north and west, with diagonal hips at the two outer corners.  A short ridge line running north-south abuts a small open-to-the-sky "room" above the bathroom. The walls to this space are about 2.4m (8') high, and hide the location of the tinaco (water storage tank) and house plumbing from view.  These walls are the highest point in the house, except for the chimney which comes up the north wall of the building and thru the roof there, several inches higher.

Not wanting to have to ever revisit the roof slab surface again, removing tiles, patching etc, we decided to put a bit more money and effort at insuring the roof was water-tight.  After doing some research, we purchased some Impercem, a cement formulation used for watertight applications (water tanks, pools, etc) and had the guys apply a smooth thin coat of waterproof stucco over the entire roof surface.  After this was cured, a coat of Fester Acriton, a fast drying impermeabilizante (sealer), was painted on top.

There was much discussion about how best to finish the roof.  Many homes here have smooth slabs just painted with sealer, usually red like we used, so we could have been finished at this point.  But, we would have to repaint the roof every seven years or so.  And we would have changed the appearance of the house significantly by removing the arching tiles that gave it the "colonial" look we liked.

In Cordoba one day, I took a tile taken from our roof to a tile and block store, to ask what replacement tiles like these would cost. Seems they would be a special order, as the only ones now made in that old style are a bit smaller. The new tiles would cost MX$8 a piece, and we'd need about 2000 tiles.  Another option would be to use a formed sheet material (steel, composite, asphalt) with a large corrugated aspect so from a distance it would be in keeping the with tiled lower roofs.  The problem with these materials is that it is difficult to attach them to a slab and prevent them from lifting off in a strong wind. We settled on using concrete "California" tiles from a local company, Pretensur, which quoted a price just about what the weaker clay tiles would have cost.  The concrete tiles from a distance are in keeping with the spanish look we wanted to maintain, are harder/tougher and safer to walk on for roof maintenance, and don't lift off in hurricanes.  The tiles would be delivered in a week.

While we waited the guys shifted focus to building the structure for our future roof top deck and mirador (overlook), and to sealing and waterproofing the space where the tinaco sat (topics for another post).  Our new concrete roof tiles were delivered late one morning.  Our guys unloaded the 1000 tiles by hand, stacking them in the backyard on three sheets of plywood laid on the ground, two rows high. As they were needed, they are carried on shoulders up two ladders to the roof top, three tiles at a time. Each tile weighs about 11¼ pounds.

Luis made the calculations to figure out how much overlap each row of tiles would require, to avoid having to the trim the final upper row at the ridge. Chalk-lining done, the first row, overhanging the roof edge by an amount sufficient to allow water to run off and not seep back to the fascia was mortared into place.  The mortar, of course, mixed by hand on the street outside the backyard gate, and brought up to the roof by the bucketful.  The only cutting we had to do was for the angles along the hips.  I brought down an esmeriladora angular (angle grinder) when we moved here, and it saw plenty of duty cutting these tiles (and later cutting, block, brick, floor and wall tiles, cutting channels in masonry walls, and with a steel abrasives disk installed, cutting rebar).

The job of re-roofing took about two weeks, as laying the tiles accurately, adhering each one with mortar, is not as quick as nailing down shingles.  After getting into the swing of things, two of the guys moved over to filling in mortar along and under tile eave edges (eg bird-blocking) along the now-finished east side of roof. They also tiled (with tiles cut in half) the top of the 18' high perimeter wall off the southeast house corner.  This put them on a stepladder on top of the lower porch roof, using the special slanted plywood platforms I had made for painting the windows there.  To do the north and west roof edges, straight drops to the ground, the guys attached wood studs to the top sides of the extension ladder so it could reach up under the eaves. These two were the gophers carrying mortar and tiles up to the roof for the guys laying the tiles down.

The final touches to the roof was the application of red sealer on all of the bare mortar surfaces.  Before we finished with our crew, they also pressure washed all of the older clay-tiled roofs, and waterproofed them a bit with a clear coat of Comex sealer.  Later I came up to the roof to fill in the few corrugations in the tiles upslope of the chimney with stucco (where in the states we'd build a cricket) that I had noticed sitting filled with water after rainstorms.

Next:  Skirt-roofs & Overhangs

30 September 2013

De-tiling the Roof


Destejado.  Here are some pictures of the tiled roof before any work was started.  These baked unsealed clay tiles are in the basic traditional curved or arabic style.  Originally, in colonial times, these tejas were laid concave face up nested on closely spaced open vigas (rafters) to form rain-draining channels, with another layer convex curve up capping the rafters and lower tiles.  On this roof, the same colonial look was achieved, but the alternating tiles were bedded in mortar on a 10cm thick sloping rooftop reinforced concrete losa (slab).

It was clear that these tiles, on the house only since it was built 15 years ago, were not the best choice for a low maintenance roof. A person must be extremely careful setting one's weight down when walking on the surface, to avoid cracking the tiles.  The only people up there would have been installers of the TV cables, and perhaps workers periodically cleaning the tiles.  Easily 25% to 33%  of the tiles on the roof were damaged in some way--broken, loose or missing.  It was an easy decision to make our first renovation job stripping and removing everything off the techo (roof) down to the bare slab.


The temporary chute at the front corner of the house allowed drop-delivery of bucket-fulls of escombro (debris) off the roof safely, deposited streetside in a big bin.  We also bought a raspador, a heavy chisel with 4' handle.  That with palas (shovels), martillos (hammers), cinceles de corte frío (cold chisels), barretas/grifas (pry bars) of various kinds, plus some well used/abused empty cubetas (5gal buckets) given to us by Frank, were all the tools needed for this job.  The 10' extension ladder (escalera de extensión) was separated into its two pieces, and one provided access to the lower roof over the comedor (dining room), with another set up on that small roof to access the main roof above.

The first job was to strip the old roofing from the dining room roof, since any trip to the top of house would tread across here.  This meant that the upper section of the ladder could then sit on something more secure than moss-covered, fragile, rounded-top tiles.  The escrombro from that small job was lowered by bucket down the ladder and deposited outside the yard along the edge of the avenida.  Then the de-tiling job moved to the upper roof, where the plywood chute sped up the process of disposing of the debris.  The tiles that came off easily without breaking, and could be cleaned by chipping with a hammer, were a material that could have a future life somewhere.

The tejas that could be saved were stacked on the roof, and eventually carried down the ladders on young shoulders, or tossed down individually to a careful catcher, to end up on the growing stack below along the back wall of the yard.  Since we had determined that newly manufactured tejas árabes (a few inches shorter & narrower than the old colonial style that were on the house) were for sale locally at MX$8 (eight pesos or approx US$0.60) each,


I put up a sign on the front gate offering to sell our excess.  After saving some for future repairs of the remaining lower roofs, we had maybe 900 tiles to dispose of.  There was sporadic interest by passers-by, but invariably when the homeowner-prospective purchaser would go home to consult his albañil (mason), nothing ever came of it.  Even at a reduced price of  MX$3, nobody bit. Towards the end of the renovation job we gave the tiles to our work crew, and they hauled them away up to their village outside of Coscomatepec for personal use.

The piles of escombro in the box and at the side of the road continued to grow, almost bursting the triplay (plywood) bin.  In addition to stripping the two larger roofs, the marquesinas (awning roofs) over the dining room door, the laundry ventana (window), and another in the sala (living room) had to come off for the planned new full bathroom on the ground floor.  This of course add to the volume of debris to be disposed of, and more used tiles to the huge stack against the wall..

Eventually we located a dump truck owner who provided two guys to pitch the debris up into their vehicle and haul it all way, all 6.5 cubic meters of it.  I  also spent one afternoon on the front porch roof, sweeping concrete grit and mortar chips down into the rain gutter, and then cleaning out the huge gutter. Despite all the care, lots of debris from the upper roof job ended up on this lower roof, but only one lower roof tile was cracked in the process.


Next: Re-roof

26 September 2013

Getting Ready

Mobilización.  It took about a month for our belongings to follow us down here, transported by a series of moving companies coordinated by Strom-White Movers in Ajijic, Jalisco.  We spent that month planning the changes we wanted to make in the house, and getting settled in a bit.  In mid-October all the "stuff" arrived, and we had to find room for everything in places that wouldn't be impacted by the upcoming renovations.  All our tools couldn't get moved into the cuarto de servicio (laundry room) which would be our eventual shop, since that would be ground-zero for staging the work on the house.  So in the meantime, all the tools and supplies were stored on temporary shelves along the south wall of the dining room. Now that we were moved in, some of our ideas for changes we wanted to see firmed up, and I generated some sketches so we could illustrate our intentions to our crew when they showed up for work.

Our labor crew still had obligations to our friends Frank and Ania, who were still working on their new house about nine blocks from here.  Those obligations took another two months, during which time we worked by ourselves on smaller tasks, which will eventually get covered here: painting, weatherizing, furnishings, etc.  We also had to locate stores and suppliers for the various supplies we would need, and buy a few tools, so several visits to the next-door cities of Córdoba & Orizaba figured in here too.  We had a great resource available to us, as we had confirmed with Strom-White that the five liftvans in which our household goods had been transported to us were, indeed, ours.  We instructed the delivery guys to move them into our backyard, where we could disassemble them for their component materials.

I found the various tools needed (wonderbar, crowbar, etc.) and  took apart the huge liftvan boxes, each approximately 4'x7'x7', constructed of 3/8" exterior CDX plywood over an interior frame of 2x4's. Many people stopped and asked the gringo if he had a use for the plywood or would consider selling it. If so – they would like some. We stacked the plywood and studs, after de-nailing and de-stapling, on the front porch,  Some of the plywood, suitably filled with  resanador  (wood filler) and sanded, was later turned into furniture, and the rougher pieces became concrete forms.

Just before our crew would start on our project, we put all our energy into building a disposal chute for the debris that would come off the roof, using plywood and lumber from the liftvans.  Pitching the broken tiles, mortar and concrete directly down onto the street would be hazardous to passing vehicles and make a real mess below.

The tall vertical box-like structure sat on the lower porch roof, tied into the roof beams that extend out under the eaves, and had a sloping bottom so the waste would end up along the sidewalk and street edge on the north side of the building. This required hauling materials, some precut on the ground, up ladders to the roof, and two of us working to get them nailed or screwed into place.

The third week of December the crew of workers was finally ours.  The day they arrived, I briefly explained what we wanted done with the house, and all agreed that working on the roof was the top priority, considering that we had experienced various leaks in some of the upstairs rooms in the rainy part of the past October.  As the first job for the crew, I set them to building a receiving bin on the road, below where the chute would discharge, using the pallet-like bottoms of the old liftvans.


Next:  de-roofing

24 September 2013

Welcome

"Casa Azuledos" as purchased (but with graffiti on side wall blotted out)

¡Bienvenidos!  My intentions here are to cover the approximately seven months spent working on renovations and improvements to our home in Fortín, topically detailing each of the steps in the process.  To work within the standard date-ordered blog format, I'm tweaking a bit to make this work.  The list of numbered labels on the right will take you the various phases of the project, no matter when they might be posted.  The other labels/tags will take you a list of all the posts mentioning specifics of note.  

Should you wish a more time-line centered and mundane perspective, our Etepezin blog covers our life here, including the renovation stuff, but not with the detail intended here.  Some of the images there also appear here, but you'll find more pictures pertinent to the work being discussed in each post here.

Here are sketches of the two floors of the house, as it was purchased.  To orient yourself, remember that the front door of the house (at the left of the sketch), faces approximately east-southeast:
The 10m x20m lot is bounded on the west by a 3m high privacy wall, and on the south by the building walls and a 5m high privacy wall.  The house's street-side front garden and north side of the front porch are bounded by 2m high steel rod fencing, as is the small garden on the north around the chimney.  The entry and automobile gates are of the same steel fencing material.

The two front bedrooms look out over the sloping tiled porch roof, and the sloped roof over the dining room in the back is also tiled in this matter, with the bathroom window looking out over this slope.  All three bedrooms have two large windows, looking out over the street in front, and the patio in back.  The laundry has a parapet wall around the flat roof, where the propane tank is situated.

Some background:  Having selected beautiful Fortín de las Flores, a small town midway between the cities of Orizaba and Córdoba in west central Veracruz State, for our retirement living, we spent several months, in the winter of 2011, living in a convenient motel and house-hunting.  As pet owners, we quickly eliminated the option of renting, as this reduced our choices tremendously -- few Mexicans care to allow people with mascotas to lease from them.  Using several real estate agents (no multiple listings or shared commissions here), and just knocking on doors or phoning the numbers on the Se Vende signs, we saw over 30 homes, some of them new. Prices for a very basic home (minimal number of rooms, all utility connections, perhaps one off-street parking space, extremely small lot with maybe only several square feet of lawn, some in gated developments) seemed to start at about MX$450,000/US$34,000.  We chanced into one home selling for a half-million dollars, but instructed our agents to only show us places worth, at most, a quarter of that.

In our home search, we were looking for:  one bedroom and full bath on ground floor, additional guest bedroom space, all utilities available (including high-speed internet), functional/adequate electrical and plumbing, building in good repair, screened windows, plenty of natural light and ventilation, off-street secured parking for one car, outdoor living space protected from the street, small easily maintained garden area, within walking distance to the town center, quiet non-commercial neighborhood, not on but not too far from public bus lines, far from the railroad tracks that pass thru town, good views of surrounding countryside, in a house design/layout that caught our attention and showed some character.  And, all this had to be on offer for an affordable price.  Casa Azuledos, we knew immediately when we first walked in, was HOME.  Those few things that didn't jibe with our list of requirements could be fixed.  This blog is about the renovations that ensued.

This blog was actually created on 24 March 2012, and contained only the image of the house at the top.  Eighteen months later, renovations well completed, I picked up the ball again to write the text here. Chances are I will continue to edit each post after it appears, to fill in additional explanations or perhaps add some images, as the thought occurs or commenters ask questions that so prompt me.